How To Prepare A Cleaning Kit For Your Home: A Complete Guide for Effortless Cleaning
Every smooth, stress-free cleaning session starts with one thing: a well-prepared cleaning kit. If you’ve ever found yourself halfway through housework and realized you’re missing a crucial product or tool, you’re not alone. Knowing how to prepare a cleaning kit for your home is the first step to making every cleaning routine—whether a quick tidy-up or a deep, seasonal scrub—faster, easier, and more effective. This guide, built on professional standards from the Quick Cleaning team, walks you through every detail: must-have items, smart organization, safety, and upkeep.
By the end, you’ll be ready to assemble your own kit or upgrade your existing system, ensuring you always have the right supplies on hand—no matter how busy your schedule. Let’s start building your ultimate cleaning companion!
Defining Your Home Cleaning Kit: What It Is & Why It Matters
A home cleaning kit isn’t just a box of supplies—it’s a thoughtfully curated set of products and tools designed to help you clean efficiently, avoid cross-contamination, and tackle any mess. Unlike random supplies under your sink, a planned kit:
- Saves time by keeping essentials together
- Improves results by ensuring you use the right tool for each surface
- Reduces stress by removing guesswork and mid-task searches
Whether you live in a small apartment or a large family home, the right kit transforms cleaning from a chore into a manageable process. Professional cleaners at Quick Cleaning use this approach to deliver consistent, high-quality results for homes and businesses across Chicago.
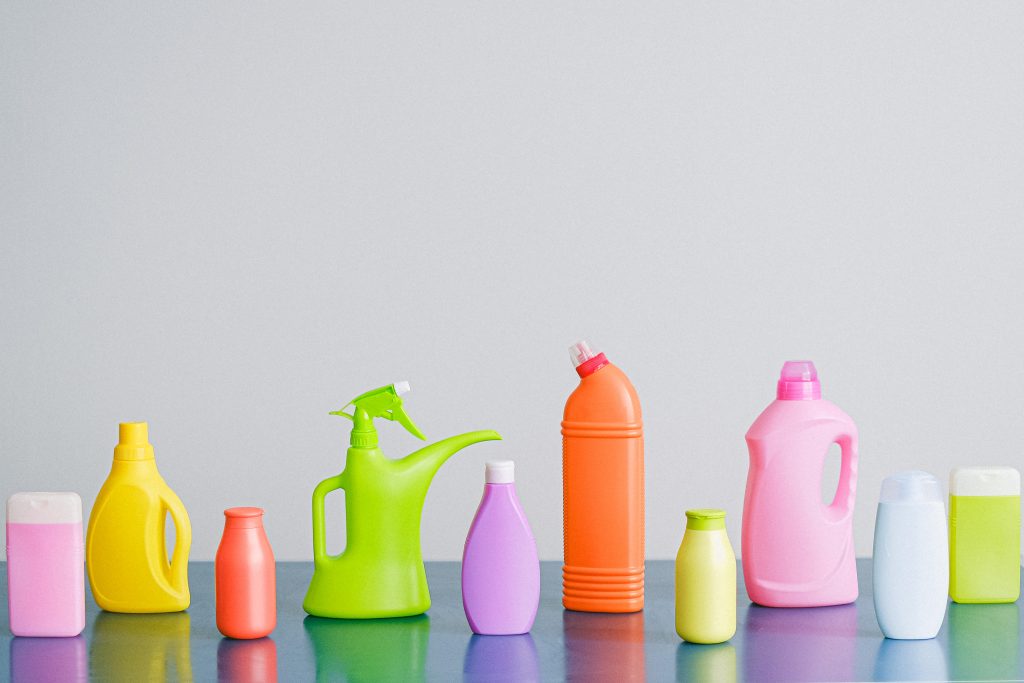
Essential Supplies: Building Blocks for Every Cleaning Kit
Your cleaning kit should include versatile, effective basics for daily and weekly tasks. This checklist covers what every household needs:
- All-purpose cleaner
- Disinfectant spray or wipes (for bathrooms and high-touch surfaces)
- Glass cleaner
- Microfiber cloths (color-coded for each area)
- Sponges and scrub pads
- Dusting mitt or duster
- Broom and dustpan
- Mop (with bucket or spray attachment)
- Toilet brush
- Latex or nitrile gloves
- Trash bags
- Optional: Stainless steel cleaner, stone-safe cleaner, vacuum attachments, eraser sponges
Every cleaning kit should adapt to your home’s particular needs. For example, if you have pets, you might add a lint roller and pet-safe products. For hardwood floors, include wood floor cleaner. Tip: Use a sturdy, easy-to-carry caddy or tote to keep everything together.
Organizing Your Cleaning Kit for Maximum Efficiency
Organization is as important as having the right supplies. Here’s how to make your kit practical and accessible:
- Choose a portable caddy: Opt for a container with dividers or sections to separate sprays, cloths, and tools.
- Label compartments: Use color-coded cloths and labels to prevent accidental cross-use (especially between bathroom and kitchen zones).
- Store in a clear area: Keep your kit in a closet, laundry room, or under a sink where it’s out of the way but easy to grab.
- Regularly restock: Check your kit weekly or monthly, so you never run out of essentials midway through a job.
For busy schedules, consider making smaller kits for bathrooms or high-traffic areas, so supplies are always close at hand. Professional crews often have specialized kits for different types of cleaning (see our deep cleaning services for details on how pros allocate gear).
Choosing the Right Cleaners for Every Surface
The wrong cleaner can damage surfaces or leave streaks. Tailor your kit to your home’s surfaces:
- Wood: Use pH-neutral wood cleaner
- Stone: Use stone-safe formulas; never acidic products like vinegar
- Stainless steel: Use dedicated polishes or sprays
- Glass/mirrors: Ammonia-based for streak-free results
For more on product selection and safety (especially for allergies and pets), check out our guide to safe cleaning products and eco-friendly alternatives.
Step-by-Step: Setting Up Your Home Cleaning Kit
- List your rooms and surfaces (bathroom, kitchen, floors, electronics, etc.)
- Gather supplies for each space, using the essentials above as a baseline
- Sort by use case (e.g., glass cleaning vs. dusting vs. sanitizing)
- Assemble in your chosen caddy or tote
- Store in a convenient spot—ideally centralized, but away from kids and pets
- Restock as needed after each session
Here is a structured comparison of kit types to guide your setup:
| Type of Kit | Recommended For | Key Supplies |
|---|---|---|
| All-in-one portable kit | Apartments, small homes | All-purpose cleaner, microfiber cloths, multipurpose tools |
| Room-specific kits | Large houses, multi-story homes | Tailored tools per room (e.g., toilet brush for bath, specialty mop for kitchen) |
| Allergen-sensitive kit | Homes with allergies or pets | HEPA dusters, fragrance-free cleaners, pet-safe sprays |
Sanitation & Safety: How Professionals Prevent Cross-Contamination
One major benefit of a cleaning kit is controlling how supplies are used, so germs aren’t spread between rooms. Best practices include:
- Use separate cloths for kitchens, bathrooms, and living areas
- Wash and disinfect all cloths/sponges regularly
- Never reuse toilet brushes or gloves elsewhere
- Read product safety information, especially for disinfectants and sprays
The Environmental Protection Agency offers valuable guidance on product safety and avoiding the spread of germs (see their EPA resource on home pests and cleaning).
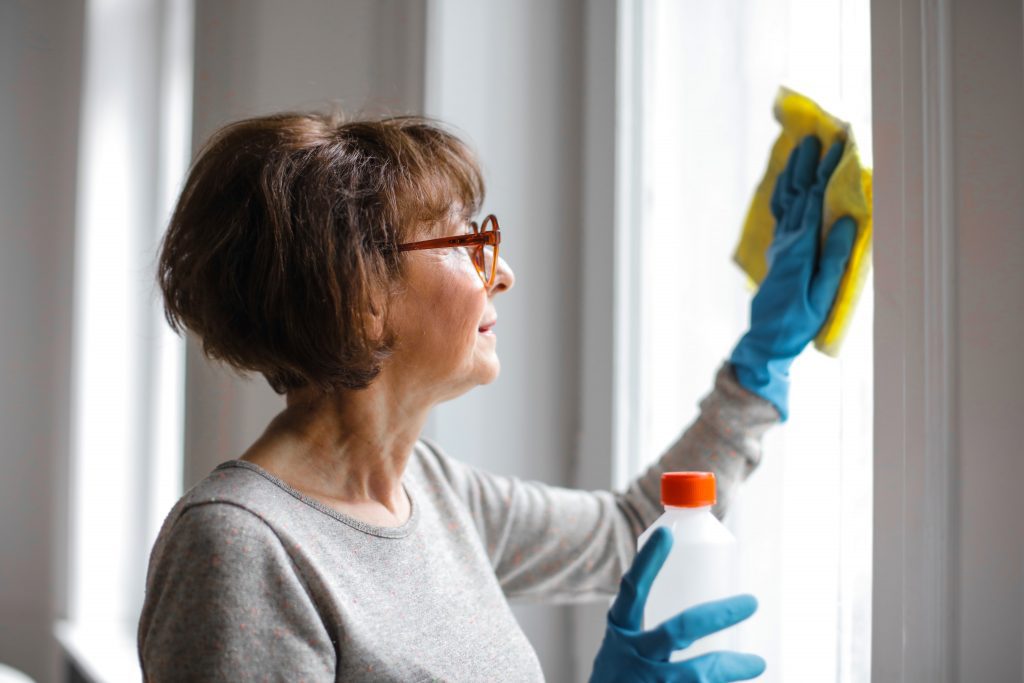
Choosing Microfiber, Cloths, and Sponges: What to Use and When
Not all cleaning cloths are the same. Here’s how to make smart choices:
- Microfiber: Excellent for dusting and streak-free surfaces; traps microbes and reduces chemical need (benefits of microfiber)
- Cotton rags: Absorbent for heavy-duty tasks and spills
- Eraser sponges: Tackle stubborn marks, but test first
- Non-scratch sponges: For delicate surfaces
Designate tools by room or task. For more advice, explore our complete supplies checklist.
Refills & Restocking: A Routine for Never-Empty Kits
Running out of cleaner mid-task halts your progress. Establish a quick habit:
- Check kit inventory after weekly or monthly cleans
- Add items to your shopping list or order online when low
- Store backup supplies in a central location
If you use recurring cleaning, ask professionals about recommended supplies for ongoing maintenance between visits.
Adapting Your Kit for Special Occasions & Seasonal Deep Cleans
Certain times of year—or special events—call for adjustments to your kit:
- Spring/Fall: Add tools for window tracking, baseboard scrubbing, specialty floor care (spring cleaning tips)
- Holiday prep: Stock up on stain removers and extra towels for guests
- Post-event or after illness: Increase disinfectants and single-use supplies
See BuildingGreen’s overview of post-construction cleaning for best practices after renovations or big projects.
Budget-Friendly Ways to Stock and Maintain Your Cleaning Kit
You don’t need to buy every specialty tool at once. Here’s how to keep costs reasonable:
- Start with multipurpose cleaners, then add specialty items as needed
- Look for reusable, washable cloths over disposables
- Buy bulk supplies for high-use items (gloves, trash bags, sponges)
- Repurpose containers you already have to organize your kit
Invest in quality for the core items—professional-grade microfiber, sturdy brushes, and safe cleaners often last longer and work more effectively, saving money over time.
Customizing Kits for Homes, Apartments, and Special Facilities
No two households are the same. Consider these special cases:
- Apartment kits: Focus on compact, stackable tools and supplies.
- Family homes: Add more robust supplies, including extra gloves and heavy-duty cleaners for bathrooms and kitchens.
- Pet owners: Include enzyme cleaners and pet-hair rollers.
- Allergy-sensitive households: Stock HEPA-rated dusters and avoid scented products (see common allergens guide).
- Airbnb/short-term rentals: Prepare small secondary kits for guest turnovers with labeled supplies for quick resets between stays.
For offices, gyms, or facilities, check out specialized service options such as commercial cleaning for proper supply handling and safety compliance.
Quick Cleaning’s Pro-Recommended Supplies Checklist
Based on years of in-home and commercial work, Quick Cleaning recommends this starter list. Adjust for your unique needs:
- Heavy-duty caddy/tote
- Microfiber cleaning cloths (multi-color)—at least 5–6
- Scrub sponges (2–3, non-abrasive)
- All-purpose cleaning spray
- Bathroom and kitchen disinfectant spray
- Glass & mirror cleaner
- Bristle brush or old toothbrush
- Broom, dustpan, mop
- Latex/nitrile gloves
- Trash bags, paper towels
- Optional: specialty floor or appliance cleaners
This list ensures you’re prepared for routine and deep cleans alike. For specialty projects (like move-out or event cleaning), check whether extra supplies or equipment are required. If you’re ever unsure, contact a professional for tailored recommendations.
Smart Storage Solutions for Your Cleaning Supplies
Where and how you store your kit impacts convenience and safety. Best practices include:
- Keep kits out of reach of children and pets
- Store together in a closet, utility room, or under the sink (locked if necessary)
- Hang brooms/mops on wall racks to save space
- Organize by frequency of use: daily items at the front, seasonal or occasional at the back
For homes with minimal space, invest in vertical storage or wall-mount solutions. Consistent storage encourages frequent, hassle-free cleaning.
DIY Cleaning Kit Upgrades: Green Products and Eco-friendly Options
More households are seeking safer, sustainable alternatives for health and environmental reasons:
- Choose biodegradable sponges and natural fiber cloths
- Opt for plant-based cleaners or make your own with ingredients like baking soda and vinegar (for surfaces that tolerate it—never stone or wood)
- Refill bottles to reduce plastic waste
For a focused list, see eco-friendly house cleaning tips and chemical-free product benefits.
Routine Maintenance: Cleaning and Disinfecting Your Cleaning Tools
Dirty supplies spread grime and germs. Schedule monthly or post-heavy-use washes:
- Microfiber cloths: Wash in hot water, avoid fabric softeners
- Sponges: Replace every couple weeks or microwave wet for one minute to kill microbes
- Brushes: Clean with soap and hot water; dry thoroughly
- Mop heads: Wash after dirty jobs; air-dry completely
Professionals never reuse soiled supplies between jobs—borrow this best practice for your home kit.
FAQs: Everything About Assembling Your Home Cleaning Kit
- What is the most important item in a home cleaning kit?
A good microfiber cloth—they’re versatile, efficient, and minimize chemical use. - How often should I restock my cleaning kit?
Check weekly or at least monthly, depending on how often you clean and how many people are in your home. - Can I use the same cleaner on all surfaces?
Not always. For example, avoid acidic products on stone and use polishes only on designated materials. Always read labels. - Is it better to create one large kit or several small ones?
For most, a central kit works well, but multi-story homes or large families often benefit from smaller, room-based kits. - What are common mistakes to avoid?
Mixing supplies between bathrooms and kitchens, not restocking regularly, and storing supplies where kids or pets can access them. - How do I safely store chemicals?
Keep all chemicals in original containers, away from food and out of reach of children and pets. Use child-proof locks where needed. - Should cleaning tools be washed after every use?
Cloths and mop heads should be washed after heavy-duty jobs and at least weekly for maintenance cleaning. Sponges should be disinfected or replaced regularly. - How can I reduce plastic waste in my kit?
Choose reusable bottles and cloths, refill cleaners, and buy bulk packaging when possible. - Are there specialty items for households with allergies or pets?
HEPA-filter dusters, hypoallergenic and fragrance-free products, and enzyme-based cleaners for pet stains are excellent additions. - What if I prefer eco-friendly cleaning?
Plant-based, biodegradable cleaners and reusable supplies are increasingly available and effective—see our recommended alternatives above.
Conclusion: Make Cleaning Easier with a Ready-to-Go Kit
Building a complete, organized cleaning kit is the secret to stress-free housework. With the right supplies at hand, you’ll save time, enjoy better results, and make every task feel easier. Stick to the maintenance routines and upgrade supplies seasonally to keep your system running smoothly. For specialized situations or questions, don’t hesitate to consult a professional like Quick Cleaning—your trusted resource for organized, healthy homes in Chicago and beyond.
About Quick Cleaning
Quick Cleaning is dedicated to helping households and businesses in Chicago, Illinois and nearby areas keep their spaces clean and healthy. Our trained staff follows careful checklists and cleaning standards, using professional-grade products suitable for every surface. We specialize in recurring house cleaning, deep cleaning, move out cleaning, office cleaning, and specialized facility cleaning, all delivered with flexible scheduling, transparent pricing, and a focus on long-term client trust and satisfaction.

Rubber gloves:, cleaning service, house cleaning service, house cleaning chicago, house cleaning in Riverwoods IL, house clean in Bartlett IL, house cleaning company Brookfield, Cicero house cleaner, house clean service Oak Park, house cleaning company South Loop, Algonquin house cleaning